
Interface Reference
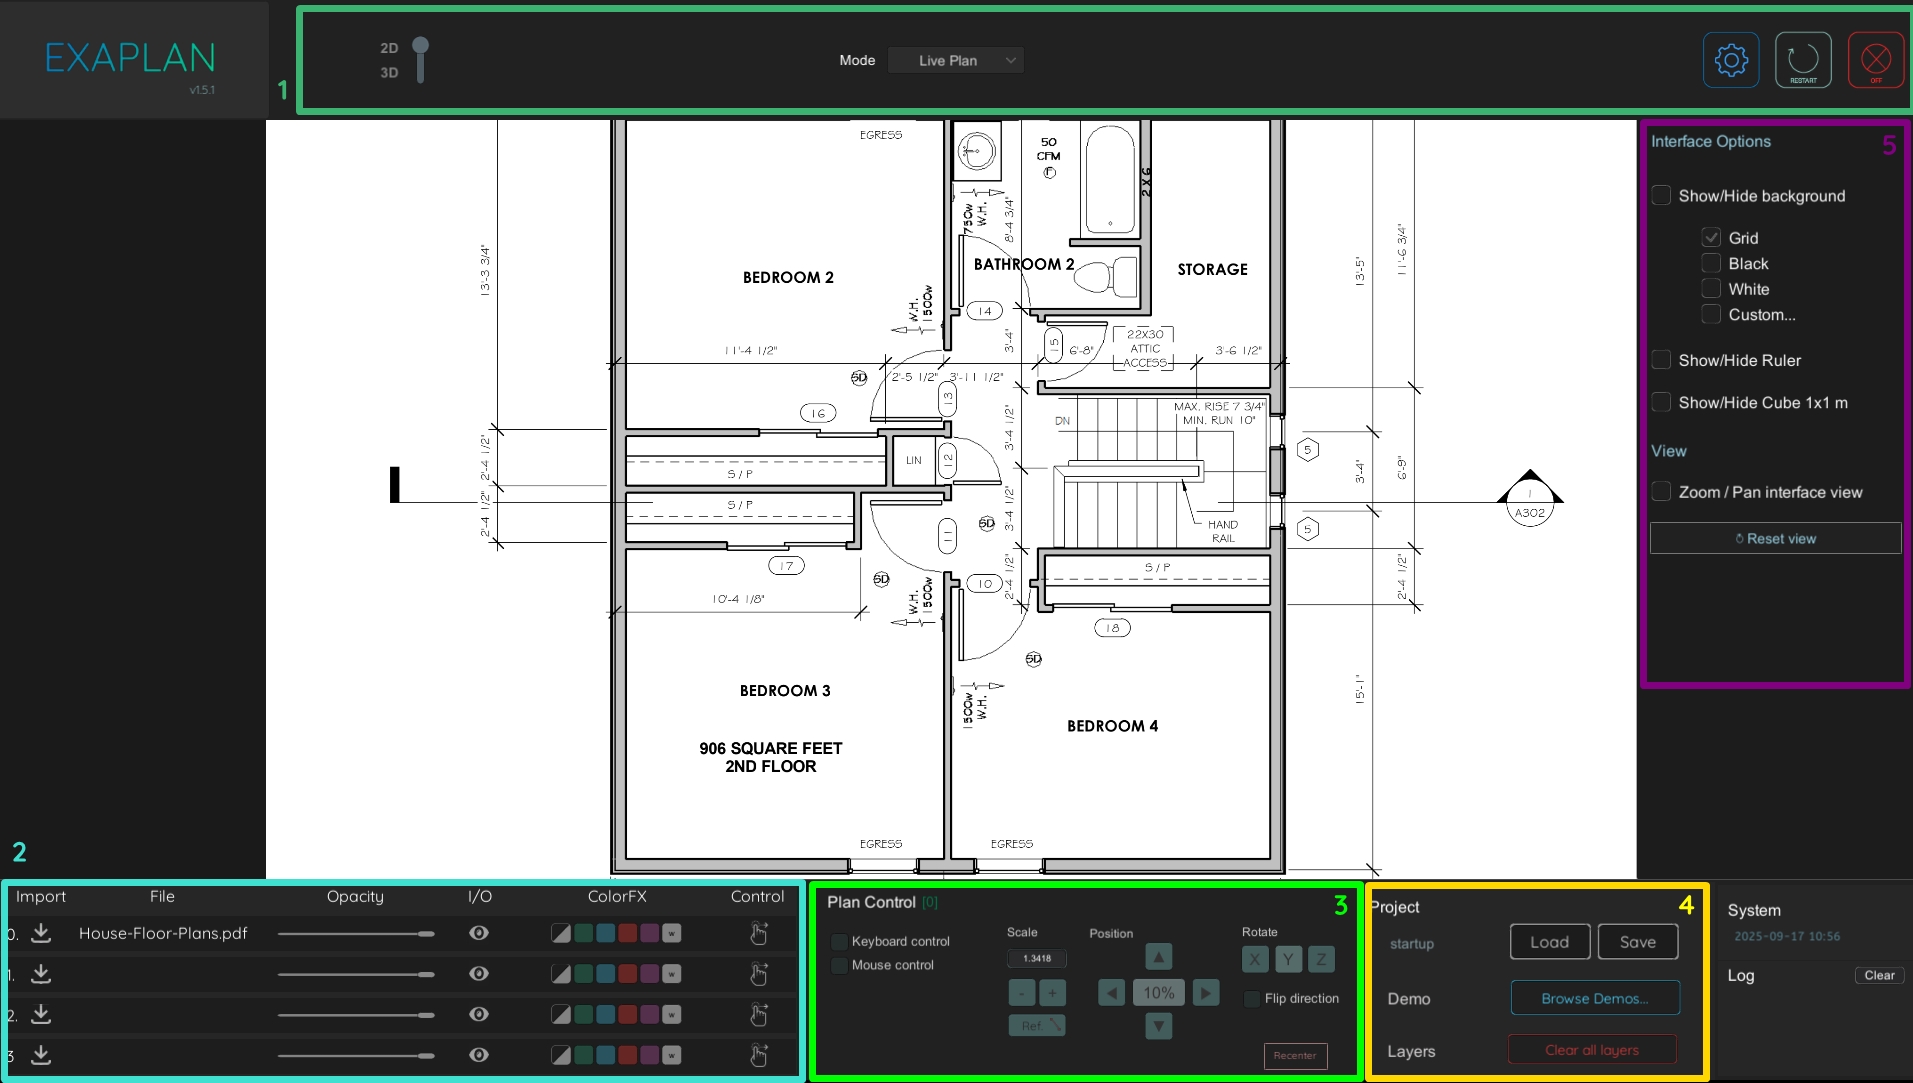
| Top menu (1) | 2D / 3D | Switch camera view from top-down to fyling 3D |
|---|---|---|
Mode: Switch between o Live Plan: real-time operation mode o Media: Play video/images |
||
| Settings, Restart, Close | ||
| Layers (2) | Import plan files | Import / Unload picture (jpeg, jpg, png, bmp) or PDF or DXF/DWG. |
| Opacity | Transparency slider | |
| ColorFX | Invert and colorize the layer | |
| Control | Select the layer as active for the plan control panel. Clicking on the row also does the same. | |
| Plan Control (3) | ||
| Keyboard control | Allows keyboard button control for scaling (+/- keys) and translation (arrow keys) | |
| Mouse Control | Allow to drag the selected plan for translation. | |
| Scale + - | Scale up and down the plan, with an input field for precise edits. | |
| Ref | Start the autoscaler function to use reference points and automatically scale to 1:1 | |
| ▲ ▼ ◀ ▶ | Move the plan vertically and horizontally | |
| 10% / 1% | Step size for the scaling and positioning. Toggle between coarse (10%) and fine (1%) | |
Rotate |
X,Y,Z rotate by 90° and flip direction by 180° around Y | |
| Recenter | Resets the position of to the initial state | |
| Project (4) | Load/Save | Load/Save the project as (.json) |
| Browse Demos… | Opens the demo panel wher you can load preset highlight projects. | |
| Clear all layers | clear the current session. | |
| Interface Options (5) | Background | Show/Hide a background pattern: grid, black, white or a custom picture. |
Ruler |
Internal reference objects to verify dimensions and scale of the digital space. | |
View: Zoom/Pan the UI camera. Reset view to revert the UI camera to default. |
This does not influence the projection view. |